This will help protect your site and your visitors and help you understand what kind of vulnerabilities you may be exposed to.
1. Insecure WordPress logins
Protect your WordPress login by using a secure password and prevent attacks from users. To prevent these attacks, it is important to: Change it from time to time using a secure password.
Your password must be eight or more characters and a combination of uppercase and lowercase letters, numbers, and special characters.
The easiest way to make sure you have a secure password is to use the password generator provided in Google Chrome browsers.
Enable two-factor authentication
You must enter your username and password correctly for two-factor authentication.
A code will be sent to a personal device such as your email or mobile phone.
After entering this code you will be allowed to complete signing into your account.
Two-factor authentication will help ensure that even if an attacker steals your login information, they will not be able to access your account.
2. Outdated themes and plugins
Any theme, plugin, or application you add to your site may bring vulnerabilities.
If attackers detect these vulnerabilities, they may take advantage of these vulnerabilities to gain access to your site and users. Follow the instructions below to avoid this monitor current versions of your components so you know when vulnerabilities are reported.
To stay up to date you should periodically check for newer versions or attachments. If you can run automatic updates for the components you need to do.
If automatic updates are not available, you should use another method to warn yourself of potential threats. Monitoring a vulnerability database.
Vulnerability databases include lists of known vulnerabilities and information on which components are vulnerable and how to repair the vulnerability.
These databases will help confirm that you are aware of any known vulnerabilities regardless of whether an update is currently available.
3. Incorrect WordPress permissions
When creating your WordPress site, you create an administrator account and also create user accounts. For example, if you have a team of people working on your site or if you have a subscription service.
Each of these accounts has a set of permissions assigned to them that determine what a user can do on your site.
When setting these permissions, it is important that you allow only the capabilities that users need. For example, you do not want your subscribers to edit posts or your editors to change site settings.
The characters in WordPress are as follows, most of them from the first permissions:
- Admin can take full control of your site.
- The editor site can modify and publish site posts.
- The author can modify and publish their own posts.
- Contributor posts can create drafts of posts.
- Subscribers can only change their profile.
To make sure you grant permissions correctly, make sure you keep users in the lowest role you can. If you find that the current is not enough, you can always change their role. However, it is difficult to undo the damage caused by users with high-level permissions.
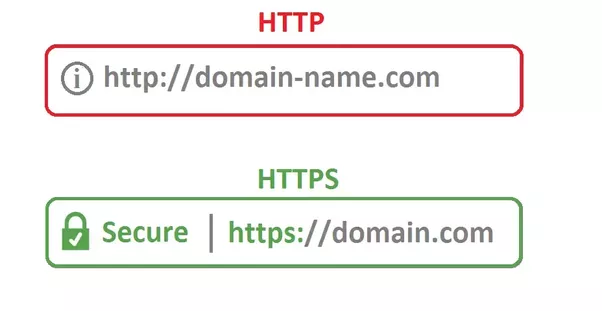
4. Running your website on HTTPS
Hypertext Transport Protocol (HTTP) is the method used to link your site to your user’s browser. If your full site address starts with http: //, you are using an HTTP link.
This link is available to any user and does not require any authorization to use it. Since HTTP links are not protected in any way, attackers can block the requests of users who visit your site. For example, if a user clicks on a link on your page, a request for that page will be sent to your web server.
If the attacker intercepts this request, they may send your user to another page.
To prevent attackers from handling user or server requests:
- Enable HTTPS – HTTPS is a modification of HTTP that includes security features to encrypt or hide the information sent in a request. This encryption prevents attackers from reading or modifying data and ensuring access only to your web server and the requesting browser.
HTTPS is very important if you are running an eCommerce site. Many users do not want to buy from a site that does not use HTTPS because they do not want to risk the theft of credit card or other payment information.
Conclusion
In simple terms, vulnerabilities are things that hackers can use to corrupt your site.
There are two types of vulnerabilities: those created by authorized users (such as site owners and users) and those created by unauthorized users (such as hackers).
Vulnerabilities created by authorized users are common errors such as code errors, incorrectly built-in plug-ins, insecure themes, and weak authentication. When hackers create vulnerabilities, they use techniques to inject malicious code into your site or to raise awareness in your communications.
Better WordPress security vulnerabilities include insecure WordPress logins, outdated themes and plug-ins, incorrect permissions, and the use of HTTP instead of HTTPS. The fact is Vulnerabilities are not only caused by hackers which are also caused by human errors.
The good news is that you can avoid many problems by following the procedures outlined above.
OK, now move your site from HTTP to HTTPS. We will take this step by step to make sure that you can follow without any problems. Above all – we care about the security of your site.
1. Back-Up Your Website
2. Implement Your SSL Certificate
3. Add HTTPS to the WordPress Admin Area
4. Update the Site Address
5. Change Links in Your Content and Templates
6. Implement 301 Redirects in .htaccess
7. Test and Go Live
After following these steps using our given link, move your website to https ssl test results. After that, browse your site with a tool like SSL Check. That way, you can catch the rest of the links you forgot. If all goes well, it’s time to go live.
Now you only need to update a few rounds.
8. Update Your Site Environment
If that works well, now is the time to take the last few steps to complete the transition to HTTPS: update your sitemap, add the site to your webmaster tools, update your CDN, and switch your analytics to save social share count.
You have finally successfully moved your website to HTTPS.
